Noah B Woodworks

A woodworking page for the free time foot soldier

Hello there! My name is Noah Budd and I am a woodworker from southeast Michigan. I hail from a small set of towns in the Upper Peninsula called Houghton/Hancock. I lived there for 24 of my 31 years, and graduated from Michigan Tech in 2019 in audio production.

In my free time I am a dad first and hobbyist second. I make music, read books, smoke pipes, and kayak fish. I am a broadcast engineer in my professional life, working an early morning 3:30 – 11:30 am shift. The early bird has most definitely gotten a worm or two.

Thanks for stopping by my site and feel free to reach out to me on Instagram @noahbwoodworks or via the email found on the contact page

-Noah

  • I’ve been doing a lot of 3D printing this week, trying to get the camera chassis finished. I took a huge step forward two days ago when the biggest print in the project was successful. Now it’s a matter of getting the hardware from the hardware store, and finishing the last prints. I tried printing the housing for the monitor and the monitor arms yesterday but I was a few millimeters off on my measurements. Luckily this print takes less than two hours, so it’ll be fairly easy to get it done.

    This weekend I’ll most likely try to go ice fishing in the morning on Friday, and then look to woodwork on Saturday morning. I’ll be attempting to make the tessellated box that I discussed in a previous blog post. It should be fairly straightforward. There’s an ice fishing expo near me that my brother invited me out to, so I’ll most likely be cut short woodworking this week even more than losing out on Fridays session. The goal is to get that box done, but I’ve got to do the carves, pour the epoxy, sand the epoxy, carve again, cut the joinery, glue everything together, cut the lid from the body then finally sand and finish. All things considered, unfortunately I believe it is a 2-3 day project. Maybe I can get out into the shop today or Thursday to make up for time lost ice fishing, or shift the work into the afternoon. Luckily, I’ve got a clear idea in mind as to what the box will look like.

  • I’ve started to use the glue/adhesive that came with my 3D printer. It’s a strange glue because it looks like a liquid deodorant stick. It’s got a fabric applicator and is a clear liquid. You rub the tube on the bed of the 3D printer and it helps keep the first layer stuck to the bed, which happens to be wildly important in 3D printing. Before using this glue, around 2 of every 3 prints would fail. Sometimes they’d fail very far into the print, which was awful because you’re not only wasting filament, but a bunch of time as well.

    I had a successful 7 hour print yesterday and finally got the battery housing printed for the new camera rig. Now I’ve got to figure out how to attach the monitor to the camera body. I’ve attached a picture of what the setup looks like currently, and it’s already such a huge improvement over what it was. That huge battery used to sit in a plastic gallon freezer bag that hung from the hook under the tripod. Now that you have a visual reference for what I’ve been trying to accomplish, I should probably explain the setup a little more.

    The huge battery connects to a battery insert in the camera. This allows the camera to be powered for (rough estimate) over 16 hours. One of the things that drove me nuts about filming was always taking the time to futz with batteries, and making sure that they were charged. This big battery eliminates the need for that so I can focus on woodworking, as well as filming in a a little more streamlined fashion.

    The next step in this process is to figure out how to attach the monitor. I’ve CADed some swing arms that I’m hoping will attach to the frame of the camera with quarter 20 screws. I’ve also designed a housing for the monitor that is similar to the battery housing. These steps should take considerably less time than the battery housing took to print, which is awesome. I’m really looking forward to working with this new setup, and this camera has given me the best image quality by far.

  • In yesterdays blog post, I mentioned that I had trouble 3D printing last week because my wife was sick and the noise from the printer is quite bothersome. Well I was able to get some printing done early in the week. I ended up finishing the entire kitchen junk drawer full of gridfinity containers. There are around 12 containers, each took around 2 hours to print. The next on the docket to print is the M50 case. I tried doing the upper half yesterday, but the overall design and dimensions needed some attention.

    I was very disappointed when the 4 hour print finished, and the camera didn’t fit into the housing. It was very discouraging. It made me think that perhaps the design could use some revision. Instead of printing an entire housing for the camera, why not attach a tripod mounting plate to the top of the battery housing? This way I could use the regular tripod mount to attach the camera to the battery. I’m thinking about 3D printing handles that have holes for quarter 20 screws, this way I can just mount the handles directly to the cameras metal shell.

    Now I just need to try printing the battery housing. With all of the supports, and extras that I’ve added to the housing, the print will take 7 or 8 hours. The plan is to start it immediately as I return home from work today. Hopefully it goes well, and the battery fits into place. I’ve also determined that the little door drawer slides needed to be adjusted from 1mm to 2mm. Hopefully it’ll be easier to remove the supports from the grooves.

  • It’s the new year and 2026 should be a good one. None of my plans are changing, but my wife is going back to school to get certified to teach middle school in Michigan, and will hopefully start in the fall of this year. That’ll be great for her, and she should have a long career in education. Over the new years break she got extremely sick with the flu, so I was on daddy/house duty for the majority of my break. I was able to do a little shop work in the mornings though, and yesterday I went ice fishing for the first time ever, which was so fun.

    I mostly wanted to get the shop back in order after all of the miscellaneous projects that I did for Christmas. The shop was a complete mess and a bunch of my stuff did not really have a home. A lot of miscellaneous gear was sitting out on the workbenches because I disassembled a rolling table to free up more floor space. I was thinking about making a bunch of cabinets with drawers, but didn’t want to spring for the sheet good materials. I ended up just finding homes for things, and rearranging some objects around. It cleaned up just fine for now and we’re good to go for 2026.

    I added lighting to the corner of the shop that houses the CNC and built an arm from the ceiling that the GoPro can mount onto. Speaking of camera gear, my wife is not the biggest fan of the noise that the 3D printer makes, so I was unable to print the Canon M50’s new housing while she was sick. I’ve re designed the housing in Fusion and it will only take around 9 hours to print the entire thing, which is great because before it was closer to 17 hours. Anyway, I mounted the GoPro above the CNC so I can take timelapses of the CNC working, which is great for social media. I made a few epoxy works just to test out the camera setup and video editing workflow. I can record on the GoPro, transfer the media to my phone, cut the video with the edits app, and post to Instagram. This should be an effective way to generate some media this year.

    I recently had an idea to make a box using a tessellated epoxy pattern. The process is: cut the tessellated pattern on the CNC with the edges of the pattern cut where the pattern repeats, fill the pattern with epoxy, sand or CNC the epoxy back flush, cut four of the rectangular tessellated pieces out with the CNC, use the new miter table saw jig to miter the edges of the tessellated pattern into a box (the tessellation should continue through the mitered joints) and then do rabbeted lid and bottom. Once the six sides of the box are made, I can use the table saw, or a hand saw to cut the box open, then mount some lid hardware into the two pieces. This should make for a cool little video, and I can make a lot of these boxes because there are a bunch of different tessellation/wrap around patterns out there.

  • So yesterday I attempted printing the housing for the m50 camera I’ve been talking about for a few weeks and it failed about 4 hours into the print. I definitely need to break the model down into smaller, more digestible chunks for the 3D printer to handle. I’ll look at splitting the section for the camera apart from the section for the battery and try to use small hardware to tie them together. This should make it easier for the 3D printer to actually complete the print. I had another mishap yesterday. For the first time the spool got stuck and stopped feeding filament into the extruder. This was a very unfortunate thing to discover.

    Not all was lost though. I discovered that you can use a light glue to help with first layer adhesion, increasing the overall quality and consistency of prints. I believe I’m getting closer to getting the temperatures dialed, and it would seem that I need to build that enclosure modification sooner rather than later. I think fluctuating temperatures are messing with the print qualities, and I may be looking into building a plate or getting a paver to help with inertial vibration. The heavier the platform that the 3D printer sits on top of, the less vibration it will see.

    The filament that is loaded into my machine is the same color as the gridfinity bins I’ve been printing, so I think I’ll try to tackle the rest of the drawer I’ve been working to organize. I’ve got at least 10 more bins to print for the drawer, which should use up the rest of that spool of filament. I’m thinking I’ll go until the spool is finished, and then look to do the m50 housing. I’m thinking it doesn’t need a full re design, just split the two halves of the largest print in the project and make them smaller chunks. This discovery is also quite valuable moving forward. If I go into a design knowing the limitations of the printer, then I’ll have faster success in the future.

  • I survived the Christmas weekend with family. It went fairly well. I was able to make an ornament for my little sister, and everyone except for my dad got their presents. With the holiday season behind us, I can turn my attention towards improving my shop and methods once again. I’ve got some PTO coming next week. I’m working Sunday (today), and Monday then I’ve got the rest of the week off, which is fantastic. I’ll most likely be waking up early those days to get out into the shop to do something productive.

    In preparing for Christmas I discovered that it is really easy to create epoxy works with the CNC. The CNC was pushed to do some better things in the last week or two. I finished the relief carving for my dad and relief carving on the CNC is no longer uncharted territory. I need a longer 8th inch ball nose router bit. The quarter inch shank rubbed against the top of the relief carving, but luckily it wasn’t bad enough to ruin the carving. My brother had some good ideas for how I could make the one I made for our dad better but I think the CNC really shines when it comes to inlays, either wood on wood or epoxied.

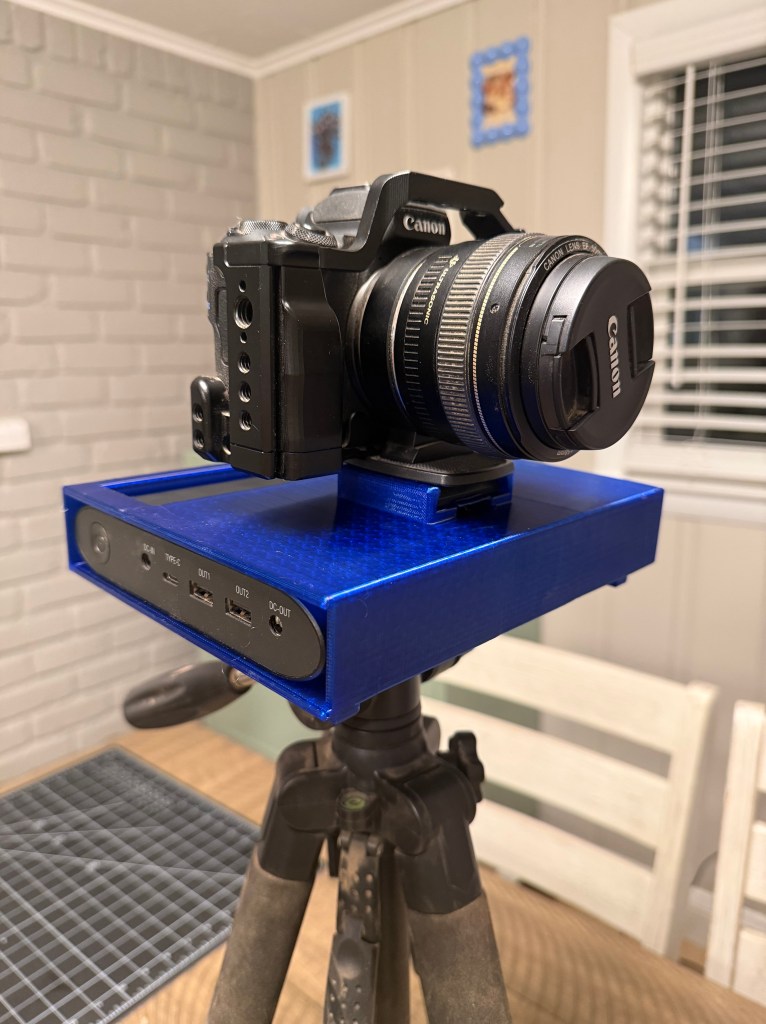
    With all of the extra time off for New Years, I’d like to finalize my camera setup by doing the massive 20+ hours of 3D printing it will take to print the camera housing. I’ll be very happy once that task is completed. After my most recent YouTube video I published earlier this year, I’m thinking I need to pull back and focus on the work. I’m not very good at talking to the camera, and that is okay. I’ll get around talking to the camera by doing a voiceover and shooting B-roll. It’s better to piece things together and take a “show don’t tell” approach. I’ve been reorganizing and freeing up space in the shop, so the larger and nicer box lights can live in the shop for more consistent and better lit shots. I also could get better at maximizing media. Thanks to work, I’ve got a nice iPhone with a nice camera on it. I could shoot vertical footage with that and start making Instagram reels again. I’m just feeling like I need to put myself out there more, but it can be challenging if you’re inconsistent, which I tend to be at times.

    At some point, I think it would be cool to create a streaming setup for the shop. Internet is the issue, I’d either need to run an ethernet cable out to the shop or purchase a Starlink subscription. Another barrier is camera setup. I’m a broadcast engineer in my professional life, so setting up a small studio would be a cakewalk, but they’re expensive. I’d like 2-3 PTZ (pan tilt zoom) cameras that I can control with a joystick controller, all running into a video switcher that is connected to the stream. The workflow would look something like: I need to use the table saw to make this cut, dial in the camera closest to the table saw, switch it on the switcher, make the cut, and continue woodworking. The idea is that there is camera coverage on every tool. I wouldn’t have to move anything around or fuss with tripods, it would just be point the camera, switch it, and go. I’m a long way away from doing anything like this, and it is definitely not a priority. In my head it makes sense though. I’m almost always in the shop at a specific time every week, so if I can leverage that consistency into something interactive, that seems like a solid strategic move.

  • Yesterday we got the presents wrapped for our toddlers 3rd Christmas tomorrow. We went grocery shopping and cleaned the entire house so we can have family over for Christmas. I finished the epoxy piece for my brother and it turned out great. I’m amazed at how easy these are to make. Run the carve on the CNC, fill the void with epoxy, sand, put finish on and it’s done! I usually like to make things that are inherently functional, but it’s good to make objects that are visually interesting from time to time as well.

    I’ve got Christmas day off from work, and then it’s into the weekend. My brother is coming to stay with us, so I’m not sure how much woodworking I’ll be able to get done. I’ll be cooking and hopefully playing some board games with the little toddler running around tonight. If I don’t get too drunk I’ll most likely wake up early to try and start the 3D relief carving for my dad’s Christmas gift. It would be good to pack the desktop CNC into a box as well, just to get that moved into place. I’m curious to see how long it’ll take the 3D relief carving to finish.

    The 3D relief carving that I have yet to complete is a topographic map of the shorefront at our cabin in minnesota. Half of it is Lake Superior, so on the flat section of water I’ve raised a rectangle out of. Once the relief carving is done, I can then V-carve letters that say “Encampment Forest Association est. 1921” on it. This should make for a very cool looking piece of wood at the end of the day.

    I’ve completely neglected to make something for my sister, so I’m thinking I’ll get her something from her Christmas list, and perhaps try to do an engraved epoxy work for her as well. I’d actually need to do that tomorrow morning on the CNC instead of the topo map, because the timeline I’ve given myself is so short. Luckily my wife got her something from her Christmas list already and signed it for all of us, but I can do better for her, especially if I’ve made something for everyone else already. It’s a lot to juggle but it’s almost over 😀 Happy holidays

  • Yesterday I was in a bit of a funk, so I ended up going out to the woodshop after work to decompress. I was interested in continuing the epoxy work I’ve been developing. I’ve made quite a few epoxy works over the last few weeks and I figured I might as well make one that is less Christmassy and more artsy. In Carveco, I changed some settings on my v-carving bit as well. The software was thinking that the tip of the bit was .01mm instead of .01 inches and it was taking a millennium to carve anything and took a lot more processing power to run the simulations. I believe I have it dialed now, and I should be able to do some really efficient carvings with these settings. The one from yesterday was 8in x 9.5 inches and it took under an hour to carve, which is a drastic improvement from the 3in x 3in carving that took 5 hours last weekend.

    The holidays are almost over but they sure are a huge distraction from the day to day. I have a fairly large list of lingering projects that need to be handled. In no particular order I need to: 3D print a housing for my camera, go crazy making a bunch of drawers for the shop, finish 3D printing gridfinity boxes for our house, 3D print a bunch of holders for sanding pads, finish the 3D topographic map for my dad for Christmas then mail that out with the old tabletop CNC, finish the three speaker boxes for my brother, and make some mechanisms for puzzle boxes. Once all of this is done I’ll be good to go for 2026.

    All of the 3D printing stuff will just take time inside, but the rest I’m hoping I can knock out in a month or two. I’m definitely looking to do the shop furniture when I have more funds to purchase a good amount of sheet material. If I could start a box and finish the topo map this weekend I’d be thrilled, but its Christmas and I’m worried for compromised glue joints due to cold weather. I’m remembering now that I have to put off the speaker boxes until it is a little warmer so the glue can set correctly. Those boxes will be relying on mitered joinery, so it’s inherently less strong. Good glue adhesion is a must.

    The cold is honestly why the epoxy work is so interesting to me right now. I can do a carve outside, sort of linger inside, monitoring with my surveillance camera and fill the void with the craft epoxy inside. Then I’ll wait 24 hours, sand the epoxy off, route the edges and put finish on. I can make quite a few art pieces this way. The drawers might be a good thing to tackle while it’s still cold out too, as they’re getting some structural integrity from pin nails, so it wont matter as much if the glue joints are compromised for now. Problem is I’ll have to pony up a bunch of money to buy the materials for that project. Seems totally worth it.

  • I made a cribbage board for my mom and stepdad for Christmas. It has engraved lettering that says “The Buddsons est. 2006” on it with other engraved embellishments. I filled these engravings with black epoxy. The really interesting thing about this cribbage board was that the holder for the pins was 3D printed. I made a small box that has a lid that slides and clicks into place, then engraved the box into the bottom of the board. I then superglued it into place and 3D printed more pins to play the game with. I absolutely love that I was able to marry the woodworking, CNC and 3D printer in such a way that made a really cool object.

  • I had a pretty decent weekend of crafting and woodworking. After making those ornaments for my co workers, I ended up doing more epoxy work. It’s a fairly convenient way to get a decent result with the CNC without having to do all the complicated setup for wood on wood inlays. I made another ornament for our Christmas tree, and an epoxied cribbage board for my mom and stepdad. I held off on the EFA topo map for my dad. I did a bunch of the CAD work only to realize I didn’t have the right router bit. I’m fairly certain that the CNC carve for this topo map is going to take a very long time. It’s a 7.5 x 7.5 inch square, and I’m sure it’ll take most of next weekend to complete. I’d like to put a frame around it and make it into a wall hanging piece and send him a nice big 3d printed topo map he can carry around to meetings as a visual aid for where work is getting done.

    I’ve printed a ton of gridfinity which is an organizational system for drawers and small workspaces. I’m looking to do our catch-all drawer in the kitchen next. This will most likely take the rest of next week. It took almost a week and a half to do an entire drawer in my office, and there are a few more to go. I printed the grids for another drawer in my office, which took around 8 hours. There are four 4×4 grids and they fit perfectly into these drawers that came with my desk. I’ll most likely stick to the translucent blue filament I used for the first drawer, but I need to order more.

    I changed the blade on my band saw, which was long overdue. I also purchase a few different sized blades to see which I like most. I used the middle size one, which I believe was 3/8″. It seemed to cut much better than the old blade, and I’m getting more familiar with the bigger saw’s setup, which is also long overdue. It is a very useful tool.

    I’ve been weary of doing a bunch of projects right now. The cold makes wood glue not work and after last year’s mishaps I can’t stand compromised joints. It feels like wasted time. I’d like to make a bunch of end grain blanks for the CNC, but these require a lot of glue ups. End grain blanks are made by rip cutting a bunch of strips of wood, gluing them together again, and then cross cutting even widths along the length of the glued board. Then you turn these widths 90 degrees so the end grain is facing upwards and downwards, then regluing the pieces back together. It’s how end-grain cutting boards are made, but they’re also very useful for 3d carving as the end grain does not shear away as easily as side grain, making detailed 3D CNC carves more accurate.